Wednesday, July 15, 2015

BreyerFest 2015 Part 1

BreyerFest 2015 has officially begun for me! I arrived a day early this year in order to hopefully snag some great deals. That paid off! Stay tuned for that in my loot post when it's all over. ;)

I arrived at the Clarion after two days of driving, or more like my mom driving. I was feeling very tired and slept just about the whole way to Lexington!

My mom was the main driver and navigator. Here she is in her groove, somewhere in the mountains of Maryland!


Just a few minutes after leaving this rest area, we had a great view of the sunset. There was fog in the valleys and it was just lovely!


Of course my good camera was in the trunk. My cell phone was handy and at the ready so I used that! It's decent... :D

After this we drove to a not-so-nice motel and stayed the night.

Bright and early we took my trusty car in to have an oil change because it was making weird noises. It helped quite a bit, thankfully!

We drove another six hours before reaching the Clarion Hotel. The first thing we noticed upon walking in the doors was the staircase was gone! They did some major renovations to add in an elevator. The stair case is now located off to the right when you enter through the main doors. It's quite nice! The elevators are also fully operational now, unlike last year. 

As far as renovations go, the wifi is also improved. It is faster and doesn't cut out as much. Yay, Clarion!


I did a little shopping Wednesday evening, and then had an early night. I sold just about everything I had brought to sell already, only leaving two wonderful little pieces to go. Unfortunately without a huge honkin shelf full o' ponies people don't really care to come in. So, they will probably come home with me! No complaints here, I really like these two!

Thursday afternoon I did some more shopping around the hotel. I stopped by Tiffany Purdy's room to admire her absolutely jaw-dropping works of art. I don't think any quality of picture could do these beauties justice, you MUST see them in person. They quickly went out of my price range, but I'm really hoping that Flash ends up in Region 10!

This is Tiffany Purdy's beautiful Flash custom. He was my absolute favorite and will be a huge hit in the show ring I imagine!

These are some other Tiffany Purdy customs that were over the top awesome! It really doesn't get much better than that. Wow.

More to come from the Artisans Gallery and Swap Meet! I finally got Blogger to cooperate with my photos so I'm super excited to be able to blog from the Clarion!


Wednesday, July 8, 2015

Stripping Models (A slightly safer way!)

Everyone makes mistakes and needs to start over. I definitely do! 

As a new artist, things don't always go as planned, experiments go awry, and I need a way to get the failed attempt off. Unfortunately "Easy-Off" is VERY toxic and it's in an aerosol container, making it hard to apply only to the model. Inhaling "Easy-Off" can seriously hurt your lungs, eyes, and it does burn your skin. If you use that, you MUST use a respirator mask and rubber/latex/vinyl gloves. 

SO, why not try something slightly safer? 

I read about this on Facebook and decided to try it out for myself.

Link to group where it was originally posted:

I'm not sure if I am allowed to post the original post with the name of the person here, without permission, and I don't know them. I don't want to bother anyone so feel free to join and check out the original post, can't miss it, it's lengthy! It's from July 5th. I am not taking credit for discovering this, just sharing my experience!

I slightly modified the directions to better suit what I had on hand.

I couldn't find any Purple Power at Wal-Mart, they must have been out. I did manage to get the last bottle at Lowes. It is more expensive at Lowes. This bottle (larger one, 1 gallon I think) was $8.00 compared to $5.00 at Wal-Mart.


I start by picking a resin that I feel needs a better paint job. In this case, it was too humid when I sealed my Snegir resin and the finish got bumpy and rough. That just won't due!

If your model has an air hole, fill it in with apoxie and redrill it after soaking. It will ruin your model if the mixture get inside.

Once you've picked a model that needs to be stripped, get a container/bucket that the model will fit in.


I used a tuberware container that was large and tall. I then put a 1/4 water to 3/4 Purple Power mixture in. I only diluted it so save the cleaner. It still worked perfectly. 


Completely submerge the model in the mixture. Make sure to set it in gently so it doesn't break. This guys ears are phenomenally detailed but thin and pointy - I had to be careful with them!

I let him sit like this overnight, it was probably about 12-14 hours. I didn't touch him or check on him at all during that time. He is an artist resin and probably will hold up better than a Breyer. I've never tried this with a Breyer or Stone. Check on them frequently as that plastic is much more susceptible to damage I hear.


The next morning I got him out and check on him. You can see the white film, that's the finish that was dissolved. He was pretty goey and yucky to touch! Be careful, they do get slippery. You SHOULD use gloves, but I forgot. I then rinsed him in cold/luke warm water.


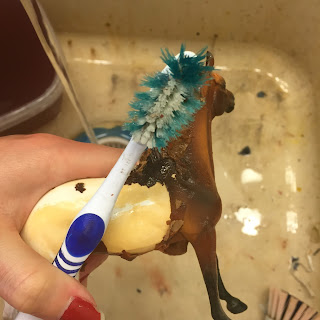
While you are rinsing, start scrubbing! I use an old toothbrush. I feel that the firmer the toothbrush the better. This one is old and over-used, it's too soft and takes a lot more scrubbing.

You will notice the paint will come off in flimsy flakes. You can go ahead and peel it off if you want, or just keep scrubbing it away. A rough sided scrubby/sponge will also do wonders.


There will sometime be a difficult spot. That would be this guy's face and fetlocks. Stick him back in, or only stick in the parts that need more soaking time. I did not make a fresh mixture, I just stuck him I'm in the same mixture, in a smaller container.


This is after he had been sitting in the mixture for about 6 hours. Even the primer on his belly was lifted, though it wasn't submerged.

Scrub it all away.

If you have soaked multiple times and some paint just won't come off, don't worry. You can sand it away with some fine grit sandpaper. 

When you are satisfied, wash the model with cold water and soap to remove any of the product still there. It WILL react with your paint/primer and ruin the integrity of the paint work put on after. So give them a good cleaning!

If you scrub vigorously you should wear safety glasses or a mask. Little bits of the liquid will go flying while scrubbing and it can be inhaled/swallowed - that's not good.

It is a drying agent and will make your skin a bit dry. Use lotion before if you don't have gloves. Then wash your hands with soap and water after handling the model.

SAFETY FIRST, PLEASE!

When all is said and done, you should be left with a blank canvas ready for new, improved clothing!


This is such a lovely resin. The sculptor did a great job, I didn't want to ruin it and disrespect her artwork. He will get better clothing soon!

If you have any questions, feel free to comment them below and I'll do my best to help out!

Thanks!


Tuesday, July 7, 2015

My Pre-BreyerFest Post!

I got tons of questions regarding BreyerFest, so here are my answers!

SPECIAL RUNS:

-What do you do when you’re called up for your special run?

You can only go through the line when your time is called. The time is located right on your ticket. Go 10-15 minutes BEFORE that time. A Breyer rep. will call a random number, this is the starting number. Say the number was 250. The person with the number 250 on their ticket is first in line, followed by 251, then 252, and so on. Number 249 is absolute last in line. There will be people holding signs throughout the line to make finding your place easier. You can always ask people around you what their number is to get a better idea of where to go. Then, you wait in line  until you are allowed to enter the store. That's it! It's pretty easy and everyone is willing to help if you get lost.

-How long do the Special Run lines take?

That depends on where you are in line. If you are first, maybe 15 minutes. If you are last, the entire hour. I usually spend about 40 minutes in line.

-Do you have to pay for special runs separately or does the ticket mean you’ve already paid?

YES! Buying a three-day ticket and receiving a SR ticket does not mean you can just get 'em and go. You DO have to pay for the special run(s) you want. The prices are posted on the program, located on the Breyer site.


CLARION:

-What is the Clarion like?

The Clarion, to me, is the best part of the entire event. There is ALWAYS something going on whether it be room sales, the Artisan's Gallery, Swap Meet, or people just milling about. It can, and does, get a bit hectic Friday and Saturday night between 6 and 10. If you are staying at the Clarion and want to go out to dinner, have fun. You will NOT get a parking space (most likely) if you return during these times and the Clarion folks don't give a damn, even if you are staying there. Been there, done that. They really outta start giving out parking passes so those staying can actually park...if you're not staying there and want to shop, hitch a ride with friends or walk from the neighboring hotels. You really do make life harder by bringing a car - and you don't usually make friends.

-Which hotel is best?

The Clarion is by far the most active, and the only hotel I've stayed at. 

-When do you book to get the hotel?

You will not get a room at the Clarion without making a reservation, usually a  year or more in advance. Those who stay there have the option to re-book the same room for next year, meaning most of the rooms are already taken before BF is even over. There is a rather long wait list that you can be put on to be notified of an open room. Last I heard, my friend couldn't get a room for 6 YEARS. You need to be proactive about it and call frequently and early on the reservation day set-up by the Clarion.

-Is parking always crowded, at the park and hotel?

Yep. Especially Friday and Saturday night. Traffic too. BE AWARE: There is ALWAYS traffic getting in and out of the park during popular times (8-10AM and 4-6PM I find).

MONEY:

-How do you balance out your money?

I don't really "balance" my money. I have a mental list of items I want, and then I just save up for them. I spend most of it early, usually Wednesday and Thursday.

-What is to be expected, price wise?

I occasionally find great deals, but nothing super spectacular. The prices are usually market-value. Look up the models on eBay and MH$P throughout the year to see what they are going for and expect to pay around that amount. If it's a popular model, add a bit. Everyone wants more money to spend, including those selling from rooms.

-How should you spend your money through the 3 days?

I spend it early to find good deals and get the items I am looking for. I hardly ever spend money on Sunday. I spend the majority Thursday and Friday.

-How much money should be brought?

It depends on what you want. Make a list of the models you will be looking to buy and find how much they are going for. Add up your list, add a bit of "cushioning" and that's a good goal.

-Are the prices better at BF than other events?

Not really. There are a few great deals to be found, but they go fast. I've found they are average market-value. 

-How to talk a seller into a lower price?

Don't be rude. Seriously. Don't low-ball them, they will take you for a kid and decide not to sell to you. Do your research and know how much the model is worth/currently going for. Offer that amount - if there is damage, rubs, scratches, etc. point it out nicely and adjust your offer accordingly. If they decline, you can always ask what the lowest amount they'd take is. If their lowest is still unfair or too high, decline and buy from someone else who actually wants to make a sale. My view: it's better to sell for a bit lower than expected than not make a sale at all. If the seller is EVER rude or condescending, just walk away. I look young, event though I am a legal adult and have had sellers treat me as if I know nothing. Walk away, do not buy ANYTHING from them. No need to support the rotten apples.


MODELS:

-Are Breyer’s cheaper at BreyerFest than in shop?

It really depends on what you are looking for. Regular runs are about the same as market value, which is what most shops sell, so no they are not particularly cheaper.

-What is sold at BF, are there retired Breyers?

There is EVERYTHING! Regular runs, special runs, vintage models, OOAK Breyers, Breyer animals, resins, artist resins, chinas, Stones, and many other brands.

NPOD:

-Have I ever been to the NPOD?

No.

-Would I recommend going to the NPOD?

Not really. There are usually only a handful of "good" models that you won't find elsewhere for the original price. And, you never know what will be there for certain. 

-What is it like?

Hectic I hear, dramatic, kinda silly. 

-What can you find in the NPOD?

Old BreyerFest SRs, artist proofs of regular runs (nothing really collectible or special about them), and maybe an event model or two. Nothing exceptionally rare usually.

OTHER:

-Where is the Breyer Store?

It is located on the map. It is in the covered arena. Ask anyone and they can point you to it.

-How early should I get there?

If you have the first SR time, probably about 8AM. If you don't need to be there any particular time, 10AM.

-What models would I recommend?

Whatever you like. There are literally thousands of models to pick from.

***What are some recommendations for newbies?

It's honestly not as big of a deal as people say. It's not super crazy or super dramatic unless you've never left your home. Then it might be a bit active. Otherwise, you'll be fine. Wear comfortable shoes, eat breakfast at the hotel, bring water or drinks as they always run out. Snacks are a good idea. TALK TO PEOPLE! Make friends! One of the things I wish I'd done my first year. Makes the entire trip more fun.

***What is something I wish I’d done differently?

I wish I had talked to more people in line and done more workshops.

***What was my first BreyerFest like?

It was fun but quite. Being shy at BF will almost ensure you won't get the full experience.

***Personal experience buying at BreyerFest/Clarion.

Simple. Cash mostly, a few take cards via Square or similar devices but very few.

***Am I going this year?

Yep!

-Where do I pick up my celebration model?

After entering, go to the big ramp and there is a window on the right. There are almost always orange cones off to that side to separate the line from those going into the arena.

-Best way to go to BF?

Drive! Better adventure and it allows you more freedom.

-Is tack sold at BreyerFest? Home made, bought, etc?

Everything is sold at BF. Models, tack, props, real horse stuff, jewelry, leather wares, pottery, you name it.


******What are the must sees/dos at BF?

The Clarion for sure. It's always nice to see some of the real horses too. Walk around, have a fun time!

Wednesday, May 20, 2015

New Technique!

I have the last three commissions here, and I have been working on them on and off the last couple weeks. As a new-ish artist, I am always discovering new techniques and ways to improve my work.

This "new technique" is one I have never heard of, or seen anyone else use before. It came about from a reference picture of a hoof. The hoof was a shell color with very fine brown lines, some stripes, and a pronounced cornet band. It was exactly what I wanted for this commission. Unfortunately, I have yet to find a small enough brush to get those brown lines fine enough. Perhaps I should just cut a bristle off one of my brushes and use that!

That, however, would take absolute ages, and many mistakes before getting right. There is so much more room for error in that way.

Instead, I remembered way back to when I accidentally used a wet flat brush with pigments. The pigments were very fine and made more brush strokes than regular acrylic paints. Of course, at that time, that is exactly what I did NOT want!

I wanted exactly that for my hooves though! I used a small (size 3 I believe) cheap, flat, Golden Taklon brush with somewhat firm bristles. I first dipped it into my cup of water, dabbed it on a paper towel to remove a majority of the water, and they flicked out the bristles with my finger. This separated all the bristles and got the rest of the extra water off. I then dusted the top of my pigment jar with the desired pigment color, and dipped the tip of the bristles in the pigment so only the very ends of the bristles had a tiny bit of pigment. Because the brush was still a bit went, the pigments became more of a paste than a powder. I then brushed this on in the direction of the hoof, from top to bottom. It created very thin lines in a diluted version of the pigment color, becoming darker on some lines and lighter on others. A nice variety! I didn't do any horizontal stripes, I thought it would look too busy and "over done". If you water down the pigments even more, you might be able to add some horizontal growth lines without it looking over-done. Or, you could only do horizontal stripes! I guess it just depends on the reference and look you are trying to achieve.

This is the result:


(Excuse the uneven hooves, the surface he is on it not flat!)

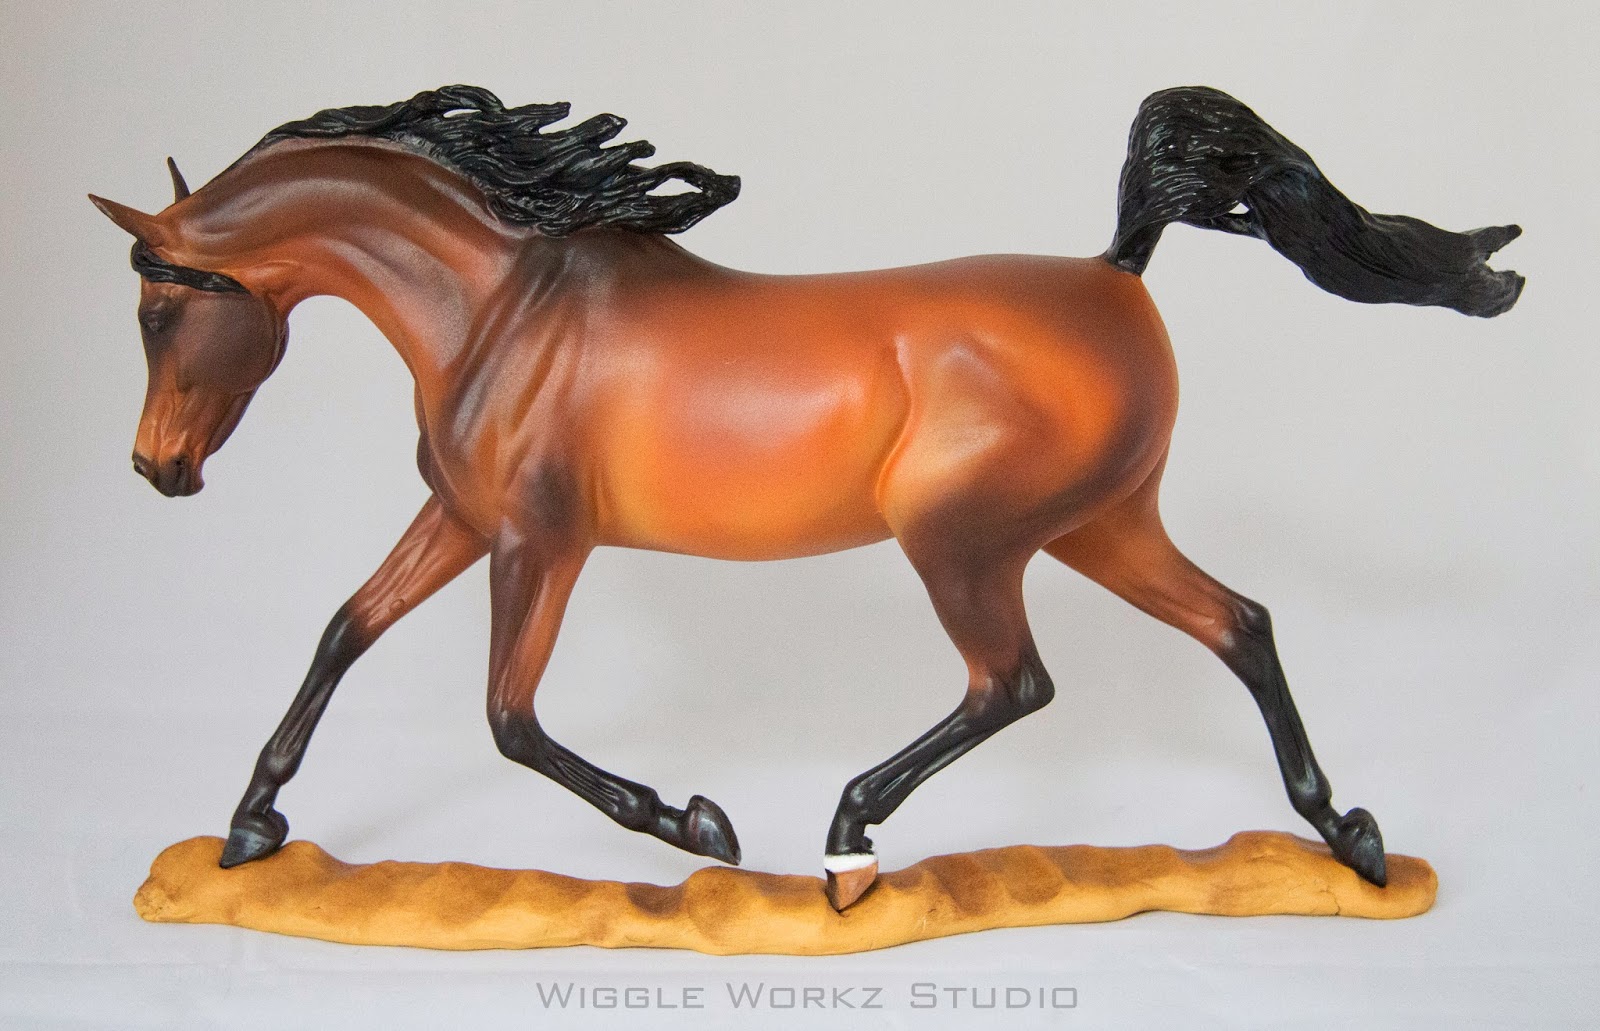
He would look fabulous with metal horse shows, but that's not part of the order. He is a fancy barefoot warmblood! He will get his touch-ups and the rest of his details later today. Definitely one of the snazziest I've done!

Sunday, May 10, 2015

Another Custom!

Well, there have been quite a few Gilen customs jumping out of my studio lately. I thought it might be a fun post to share my difficulties with the latest. It is one of my favorite molds to paint. It is smooth and everything is well defined. I always find the off-side eye a bit wonky, its not shaped perfectly. To remedy that, I have to look at quite a few references to make sure I'm not painting the eye slanted. It takes a bit of trial-and-error, but eventually it works out.

My most recent Gilen custom is a light buttermilk buckskin pinto. This color was slightly challenging. I usually have a tendency to go darker to add more shading. I wanted this color to be vibrant but pale. The base coat and first layer of shading were airbrushed to give it a very subtle look. It was dark enough, but still had color. I used a very light tan with a lot of white to get the base coat how I wanted it. My main concern was that it would look too white. Thankfully I have worked with my airbrush colors enough to know when they dry, they are usually one shade darker and not as vibrant. I cannot always rely on how it looks in the airbrush cup. It can VERY misleading and result in a color that is far from what I had been hoping for.

The next challenge with this color was adding some real color, such as yellows and red-browns, without making them over powering. I feel I accomplished this by using Earth Pigments and a big fluffy brush. I picked a big fluffy brush for a couple reasons. One, they don't hold much pigment if you tap them out well. Sometimes, it all comes out and you're left with an empty brush! Secondly, it blends the color better, and gives it a softer look. This makes it easier to add a slight area of color without really noticing it. It just blends in with the piece as a whole. Choosing the color to define the muscles was hard. I didn't want this guy to be incredibly yellow, my reference wasn't a banana, canary...you get the point. I chose Cyprus Umber Warm and Natural Sienna mostly due to the red and orange tones. These colors tied the piece together, gave it some interest, and didn't overpower the buttermilk color I was going for.

That was about it for the challenging aspects of this custom. I really like the color overall, it's soft and appealing to me. I know I will be painting this color again!


Sunday, May 3, 2015

A Few New Pieces

I have been very busy in the studio and will be finishing pieces left and right until BreyerFest. Here are a couple that I have recently finished:


Breyer Weathergirl to a bright bay


Breyer Totilas to a dark gold champagne


Feurte sculptured by Josine Vingerling to a medium red chestnut


Bust-A-Move Hackney Stallion to a dark shaded bay


Breyer Marwari to a bay sabino

Golden Palomino Gilen

Saturday, April 11, 2015

A Little Studio Update!

While I take a break from going over and tweaking my other posts, I figured I'd take a moment to share some recent customs.

In the last couple months I've painted five Gilens! It's turning into one of my favorite molds to paint.


Gold Champagne Gilen
Golden Palomino Gilen
Bay Leopard Appaloosa Gilen


Shaded Black Tobiano Nakota

Golden Palomino Gilen w/ Chrome

Bay Roan Tobiano Gilen

I have a few work in-progress models over here too, I will  be sure to share once they are finished. Maybe even sooner! ;)